How To Perform CPR (7 Steps)
Learning how to properly perform CPR is a life-changing skill to have. It can literally mean the difference between life and death for someone in need of CPR (Cardiopulmonary Resuscitation). According to experts, it should take at least 30 continuous minutes to perform CPR, so be prepared to take this emergency procedure seriously.
So, what are the steps to performing CPR? Below you’ll find quick step-by-step instructions, but keep in mind that some of these steps can be done simultaneously.
7 Steps to Perform CPR
- Make sure the surrounding environment is safe.
- Check for responsiveness from the victim.
- Call for help, activate emergency response, and find an AED.
- Check for breathing (no more than 5-10 seconds).
- Feel for a pulse (no more than 5-10 seconds, and only if you know how).
- Begin chest compressions and rescue breaths.
- Use an AED if possible
1. Make sure the surrounding environment is safe
You need to make sure the surrounding environment is safe from any hazards. If you get hurt, you will not be any help to the victim. Your safety comes first, even if you’re not the patient. Again, you must help yourself before you help others. Here are some safety hazards to look out for:
- Electrical wires
- Chemical spills
- Gas fumes
- Fire
If there are safety hazards nearby, remove them as quickly as possible, but if you can’t, drag the patient to a secure area. If the patient is too heavy to carry, yell for help or leave the victim to find someone to help you.
2. Attempt to get a response from the patient
You need to know whether the patient is unresponsive or not. If the patient appears unconscious, shake their shoulders and loudly ask if they’re okay. If the patient responds, move them to a safe area and provide supportive care. If you do not receive any physical response from the patient, move on to the next step.
3. Call for help, activate emergency response, and find an AED.
After determining that a person is unresponsive, you need to yell for someone to activate the emergency response system and try to find an AED (automated external defibrillator). If no one is nearby, you can activate the emergency response (Call 911) and try to find an AED yourself.
Generally, activating emergency response generally means calling 911. However, there are instances when there may be an internal response team with proper medical training such as at a large factory. If your company is interested in group medical training, contact us today to request an on-site training session.
When talking to emergency responders on the phone, tell them exactly where you are, what the situation is, and then listen for directions. If you are not a trained medical professional, many 911 dispatchers are able to coach you over the phone. To save time, the ideal situation is for you to learn how to perform CPR without coaching, or with a CPR wrap. If you are interested in taking a CPR training course, contact us today.
If you decide go looking for an AED, only spend 2-3 minutes searching. If it takes longer, or someone else has gone to look for it, move on to the next step.
4. Check the patient for breathing
Place your ear close to the patient’s mouth to check their breathing. If the patient is breathing properly, they may just be unconscious and will not require CPR. However, if you hear agonal breathing, breathing that sounds like gurgling or gasping in an abnormal pattern, you will need to perform CPR.
To ensure you are not mistaking regular breathing with agonal breathing, quickly scan the patient’s body for 5 to 10 seconds. If the patient’s chest does not rise and fall at a regular pace, and you are hearing gurgling and gasping sounds out of the patient’s mouth, they are not breathing properly. Do not waste more than 10 seconds scanning the patient’s body. If they require CPR, you have no time to waste.
5. Feel for a pulse

Now, quickly look for a pulse by placing two fingers in the center of the patient’s neck, and then slide your fingers down the side of the neck into the notch, between the base of the neck and the collar bone. Apply firm pressure with your fingers. If you’re checking the correct spot, you should feel a strong and steady pulse.
Pulse but not breathing
If the patient has a pulse but is not breathing regularly, you can give rescue breaths by delivering a breath once every five seconds. Every 2 minutes, recheck the pulse.
No pulse or breathing
If the patient does not have a pulse and is not breathing, it’s time to begin CPR. Follow the steps below.
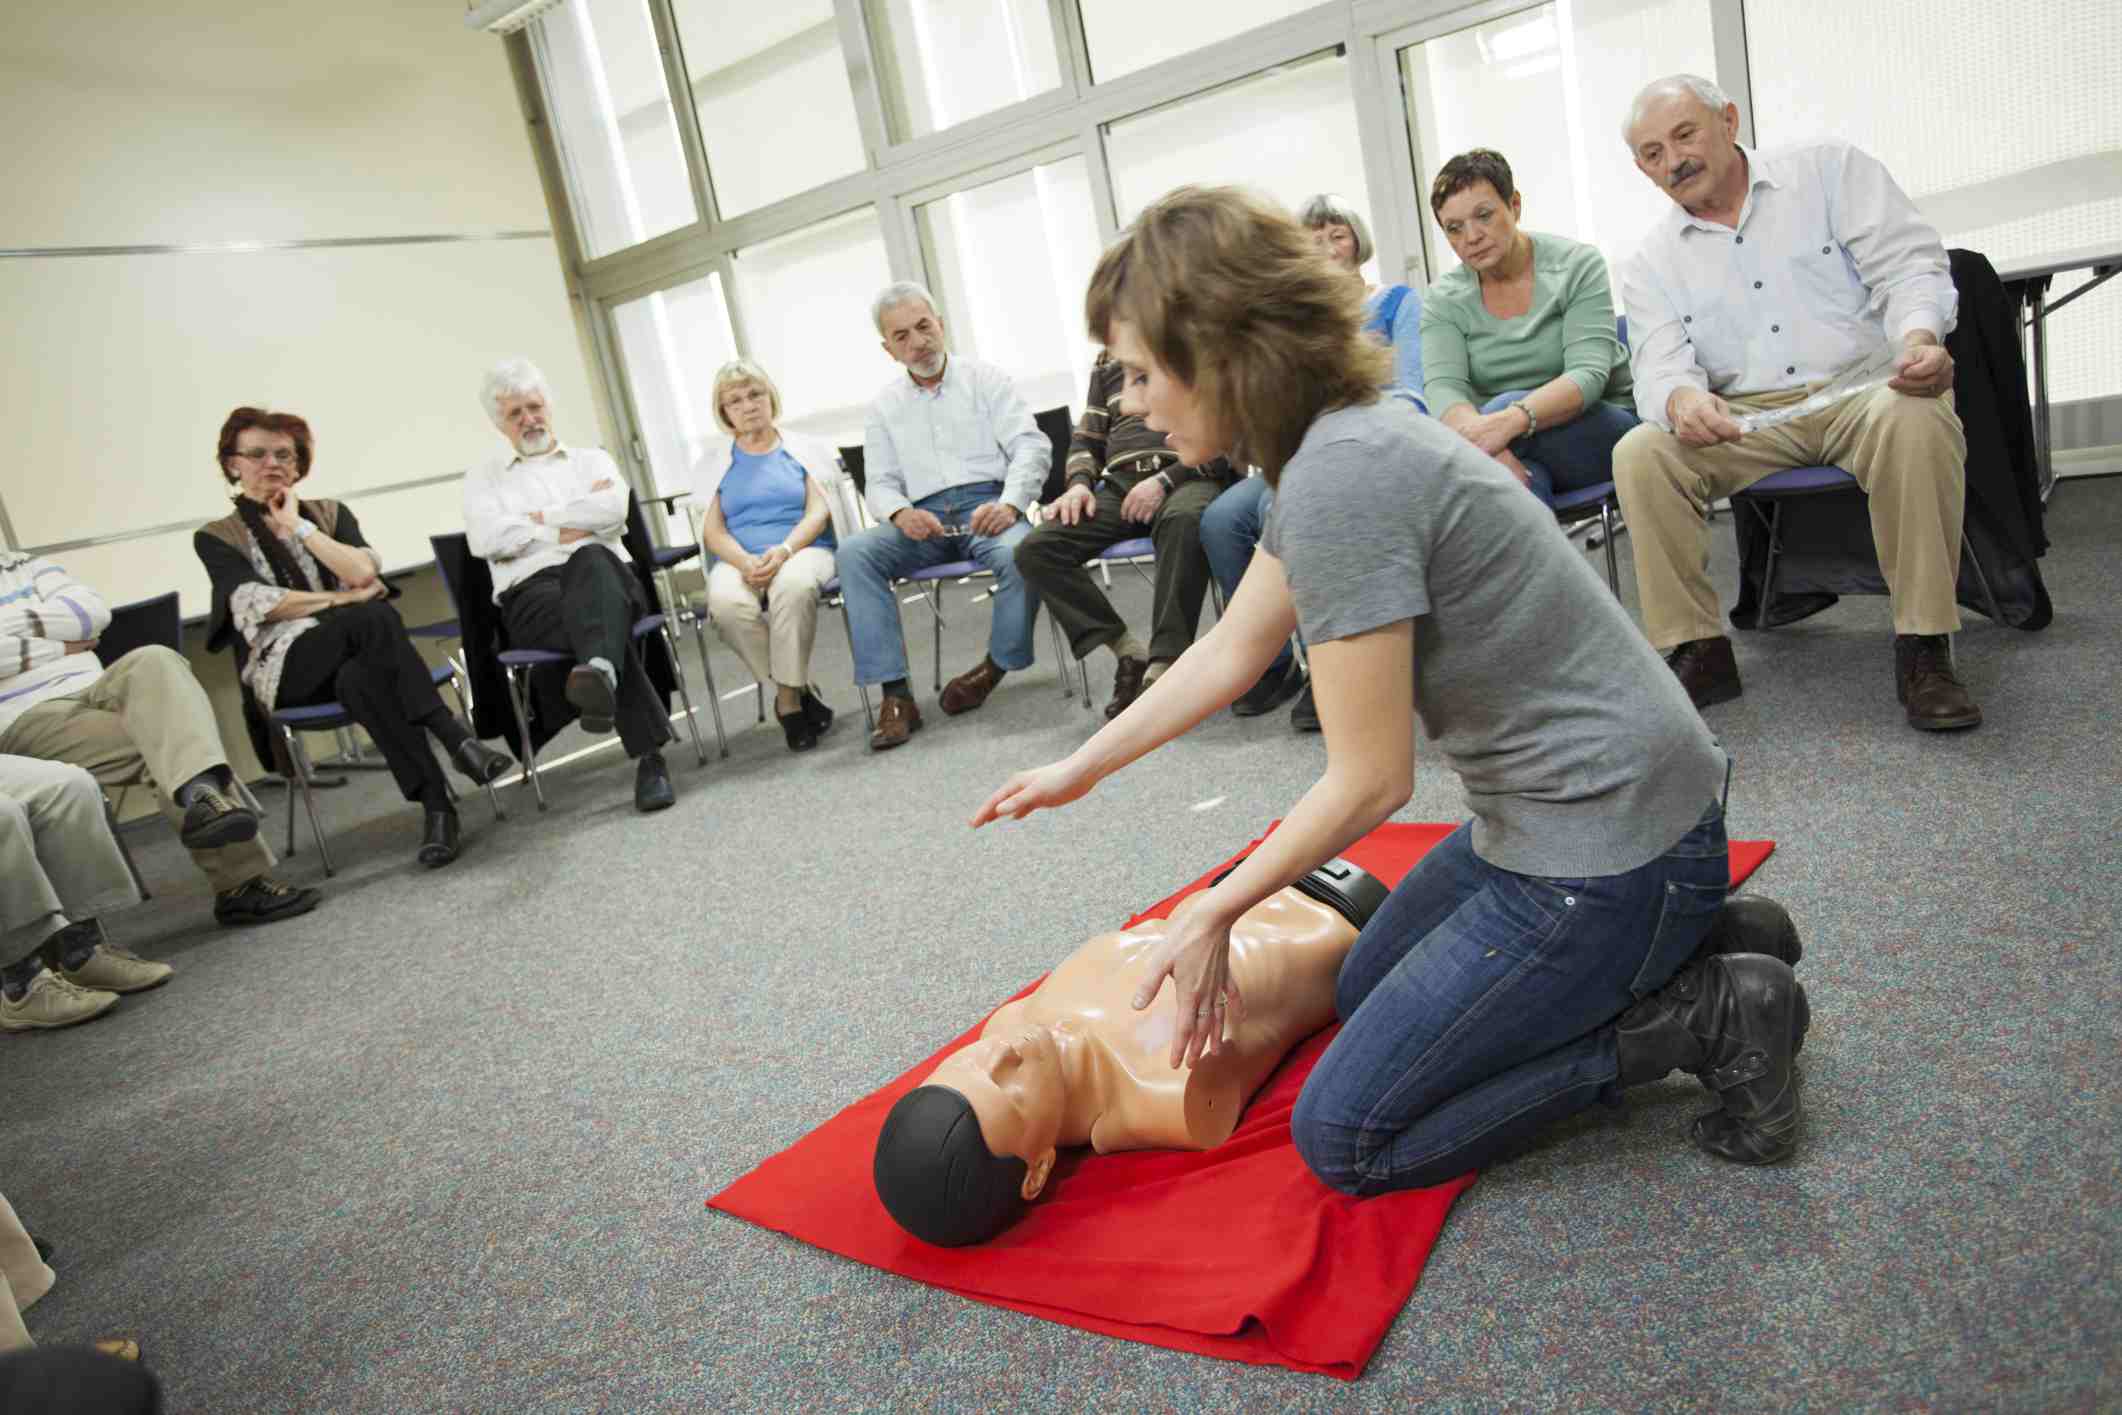
6. Begin chest compressions and rescue breaths
Here are the critical steps to perform CPR.
Steps for Chest Compressions
1. Remove clothing.
Remove all clothing that’s covering the patient’s chest. This includes bras on women. A pair of scissors is ideal to cut away clothing. If that’s not available, you can pull their clothing up to their neck to expose the chest. Do not waste too much time doing this.
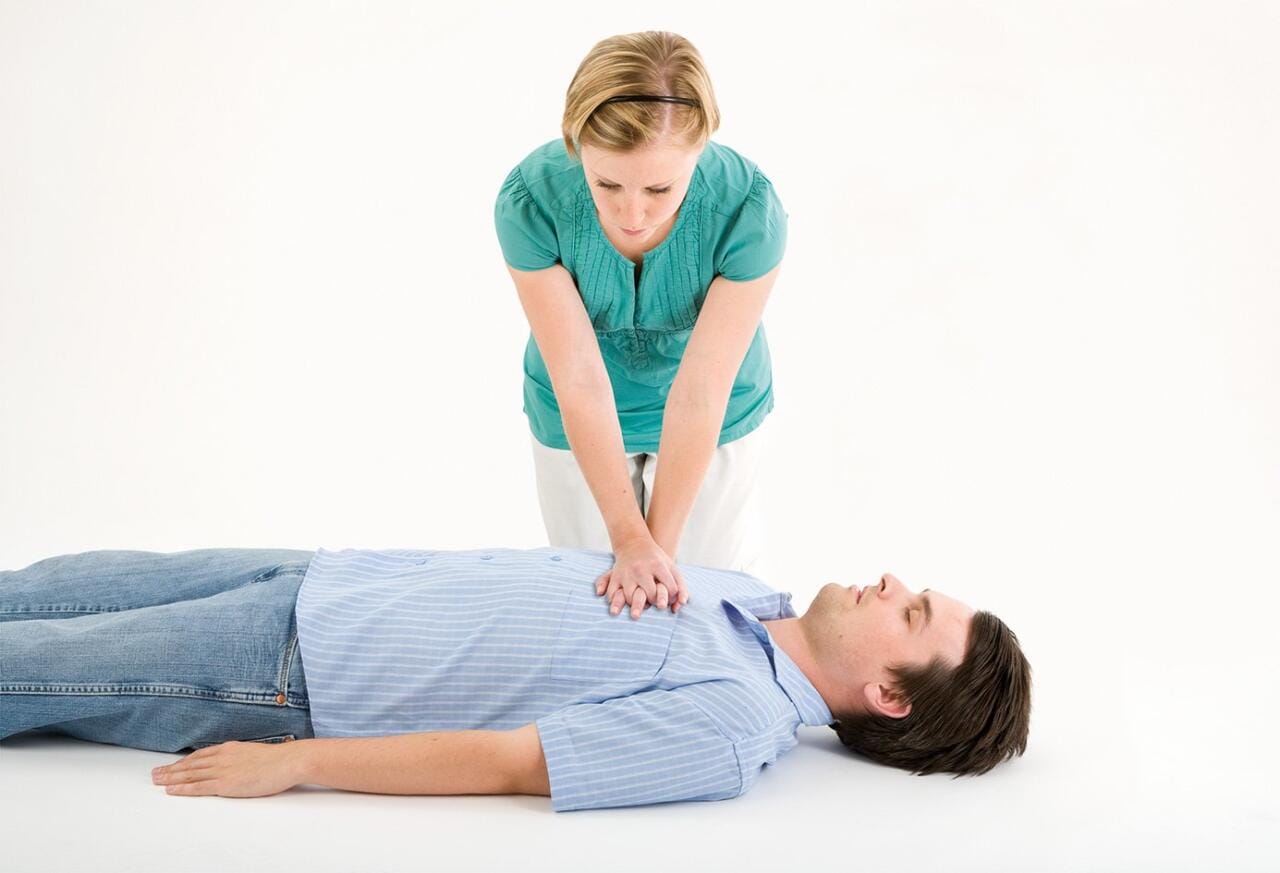
2. Properly place your hands on the patient’s chest.
A lot of people still teach placing your hands on the center of the chest at the nipple line, but this is not the correct way to find your hand placement. Instead, find the sternum (breast bone) and place the heel of one hand on the lower half of the sternum. Place your other hand on top of the first. Be careful not to place your hands too far down otherwise you may break off the tip of the sternum.
3. Properly position your body.
With your hands interlaced on the patient, keep your arms completely straight and elbows locked. Position your shoulders over the patient’s chest.
4. Start chest compressions.
Start the chest compressions by pushing 2 inches down using both your hands into the patient’s chest. Use your upper body weight from the hip up to compress down. Do not use your arm muscles to do the compressing. You may hear popping and cracking sounds, but contrary to popular belief, you’re probably not breaking ribs.After compressing, you want to allow the chest to fully recoil and come back up to the neutral position before compressing again. Do not let your hands come off the chest during this process. Full recoil is important so that the heart can fully refill with blood before being compressed again.
You will perform 30 chest compressions at a rate of 100-120 beats per minute (BPM). To help you pace your chest compressions, you can use a variety of songs to keep the beat. Some songs to consider are Staying Alive by Bee Gees, Dancing Queen by ABBA, Cecilia by Simon & Garfunkel, Hard to Handle by The Black Crowes, or even Baby Shark by Pinkfong. You can check out the American Heart Association’s official playlist of songs for CPR. It’s important to stay within 100-120 bpm. Going too slow does not give the body enough blood pressure to push oxygen-rich blood into the tissues. Going too fast does not give the heart enough time to refill with blood. Also, be sure to limit interruptions in chest compression to no more than 10 seconds such as when you are giving breaths or using the AED. Interruptions greater than 10 seconds will cause the patient’s blood pressure to fall, and it will take several compressions to increase their blood pressure the proper level for CPR to be effective again.
Steps for Rescue Breaths
This is an optional step. We talk more about why we don’t give breaths during CPR. However, if you choose to give breaths, here are the steps.
- Perform a head-tilt-chin-lift by placing one hand on the forehead and the other hand on the chin. Tilt the head back to open the airway.
- If you decide to give mouth-to-mouth breaths, pinch the nose with one hand and place your mouth over their mouth. Give 2 breaths. Just enough to see chest rise or about one second for each.
- If you have a mask, use both hands to get a seal on the mask which should be covering their nose and mouth. Make sure to also use a few fingers to tilt the head back. Then give 2 breaths.
Continue giving cycles of 30 compressions and 2 rescue breaths. We talk more about when to stop CPR in another article.
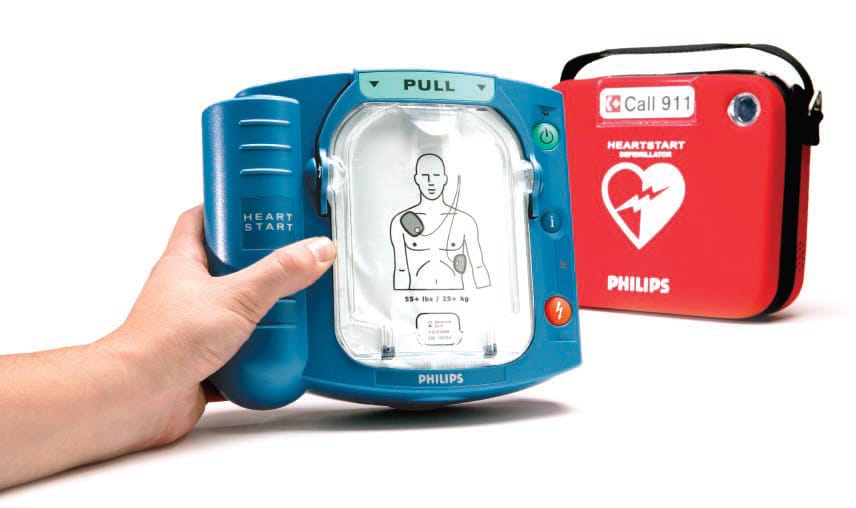
7. Use an AED if possible
An AED is used to detect certain abnormal rhythms of the heart and then deliver a shock to restore a normal heart rhythm. An AED is very user-friendly and safe to use for anyone regardless of whether you’ve received training. The machine will audibly and/or visually tell you exactly what you need to do, so don’t be afraid. Every instruction is very straightforward, even older children should be able to use an AED.
If you have someone with you, have them turn on the AED while you continue giving CPR. If you don’t have anyone with you, stop CPR immediately once you’ve received the AED and follow these steps to give:
- Call emergency services. Although you may have already done this, some AEDs will instruct you to call emergency services in case you’ve forgotten.
- Remove clothing. If you haven’t already, remove any clothing off the patient’s chest. Make sure the chest area is dry. It can be moist but not soaking wet. Some people will tell you to remove jewelry, bras, and anything else that contains metal in order to prevent electrical burns, but this is not a critical step and only delays life-saving interventions.
- Shave hairy chests. Hair on the chest may prevent the pads from sticking. If you run into this, you will need to shave the hair with a razor. Alternatively, you can use a pair of scissors to cut the hair down to a stubble. Some people recommend using the pads to rip the hair off, but that is not a great solution because often AEDs only come with one set of pads.
- Turn on the AED. Turn on the AED and follow the command prompts. AEDs can either be turned on by pressing the On button or by opening the front lid depending on the model you are using.
- Remove pads from the packaging. The pads will be in a sealed plastic package to prevent the adhesive from drying out. Remove the plastics from the pads, and then place them on the patient following the illustrations on the pads. The illustrations show exactly where you should place each pad. One under the right collar bone, and the other under the left armpit next to the breast.Pads are interchangeable regardless of what picture is showing on each pad, but the location of where the pads are placed remains the same.
- Clear for analysis. When you place the pads on the patient, make sure no one is touching the victim so the machine can evaluate the patient’s heart rhythm. Loudly state “Clear!” and visually check to make sure no one is touching.
- Clear for shock. The AED may advise that there’s no shock needed, and that you should continue performing CPR. Otherwise, the AED will state “Shock is advised” and will warn everyone to stay clear. For a second time, loudly state “Clear” and visually check to make sure no one is touching the patient. The AED will deliver an electrical shock and then instruct you to continue CPR for two minutes before it does another evaluation.
- Continue CPR. With the AED pads still on, begin with 30 chest compressions and then 2 breaths and continue this cycle.
- Reanalyze. Every 2 minutes, the AED will tell everyone to clear and will reanalyze. Follow steps 5-7 each time this happens.
What to do when the patient becomes responsive.
Continue to monitor for signs of life. If the patient becomes responsive by opening their eyes, moving their limbs, or talking, you need to stop CPR and place them in the recovery position. To do so, place the arm that’s closest to you and move it upwards. Grab the other arm and place it against the patient’s cheek. Grab the leg that’s farthest from you and pull it upwards until that foot is flat against the floor. Gently pull the patient towards you until they are laying on their arm. It should look like they’re sleeping on their side. Adjust the body until it’s stable, making sure the head and mouth are angled down.
If you followed these seven steps correctly, you will have done enough work to extend or even save the patient’s life until emergency help arrives. Learn and memorize these steps so that you can perform CPR without wasting any time. Remember, it can mean the difference between life or death.
Performing CPR on a child
Performing CPR on a child should still follow the 7 steps above. Here are the only changes you should make:
- Rescue breaths. Because children have smaller and more fragile lungs compared to adults, you should not blow as strongly into the child’s mouth. Also, when tilting the child’s head back, do not tilt it too far back as you can easily kink/block the airway instead of opening it.
- Chest compressions. Children will typically have smaller and more fragile chests compared to adults, so when performing chest compressions, you may only need to use one hand instead of two.
Performing CPR on an infant
Performing CPR on an infant is very similar with a few key differences. Here are the only changes you should make:
- Rescue breaths. Place the infant in a “Sniffing Position” by tilting the head back far enough until it looks like the baby is sniffing the air. When performing mouth-to-mouth rescue breaths, cover both their nose and mouth and blow very gently.
- Chest compressions. Instead of placing your hands on the infant’s chest, you should only place two fingers in the same place as you would on an Adult or Child. The chest compressions should only go an 1-1.5 inch into the infant’s chest.
- AED. Some AED pads may overlap due to the infant’s small torso. If they do, put one pad on the front over the sternum, and one pad on the back between the shoulder blades.

